Suppose the combined weight of rider, bike and equipment is 78 kg. The tyres measure 30 mm on the rims, and the course has tarmac with some broken patches. For a road bike averaging 31 km/h, the Tire Pressure Calculator suggests 4.70 bar or 68 psi at the front and 4.85 bar or 70 psi at the rear.
These numbers are a useful starting point. They do not prove that 68/70 psi is the only correct or absolutely fastest pressure for your bike. The calculator does not know your exact tyre and rim construction, actual weight distribution, every surface irregularity or the accuracy of your pump gauge.
The central message is valid: more pressure does not always mean lower total resistance—and therefore more speed for the same effort—on the road.
Pressure must balance speed and control
The right pressure should provide:
- low rolling resistance,
- adequate tyre support through corners,
- braking grip,
- protection against hard rim impacts,
- limited puncture or air-loss risk,
- comfort and control on the actual road surface.
Pressure that works on a smooth velodrome is not necessarily suitable for poor tarmac, wet corners or gravel trails. If a setup is fast in a laboratory but makes you bounce, lose your line or repeatedly leave your aero position, it is not fast for your race.
Why higher pressure looks faster on a smooth surface
As a tyre rolls, its contact patch deforms and then returns to its original shape. The process is not perfectly elastic, and some energy is lost as heat. Lower pressure generally increases deformation and these losses.
Roller testing clearly demonstrates this. In a study using 20–28 mm tyres at around 80–120 psi, required power generally increased as pressure decreased. That finding is useful, but describes tyre behaviour on smooth surfaces rather than all resistance encountered on real roads.
An earlier study of seven trained cyclists found no detectable oxygen-consumption difference between pressures of around 80–140 psi under its test conditions. Small pressure-related differences can easily be obscured by measurement variability.
What breakpoint pressure means
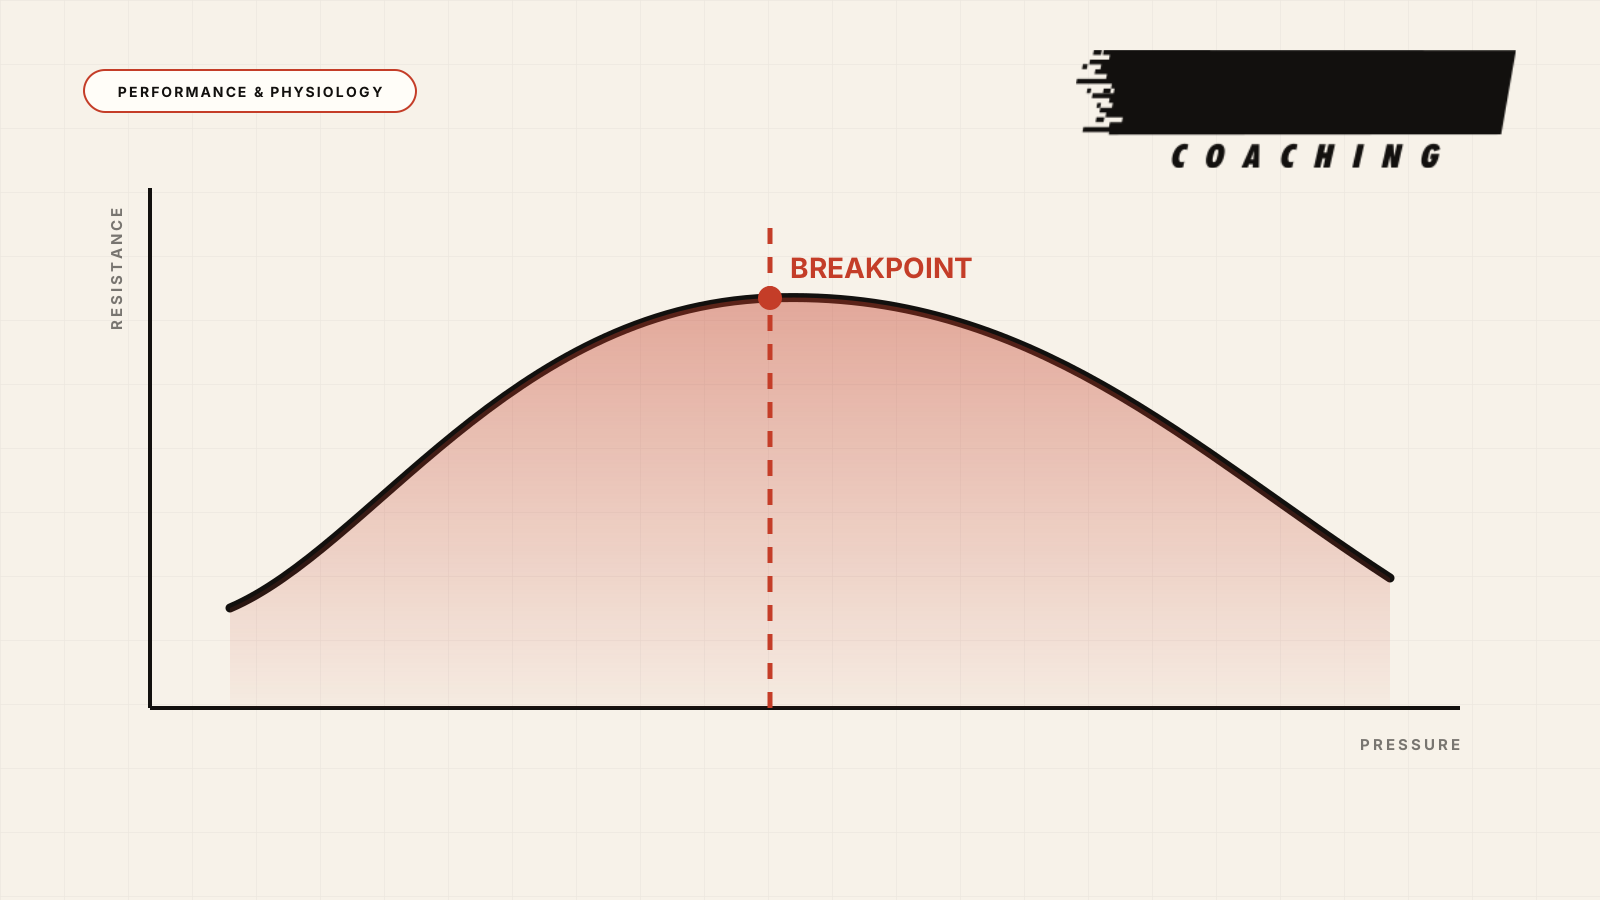
On the road, a tyre must follow small surface irregularities. When it is too hard, more of their energy is transmitted as vertical motion and vibration through the bike and your body. These are often called surface, impedance or vibration losses.
The breakpoint-pressure model assumes that:
- tyre-deformation losses are greater at low pressures,
- these losses decrease as pressure rises,
- beyond a point, greater transmission of road irregularities begins to increase total resistance again.
This point is called breakpoint pressure. It is the region this calculator attempts to estimate.
The breakpoint is not a proven number for every tyre, rim and road combination. A more recent laboratory study using different widths, pressures and loads found nonlinear relationships, but no single optimum that simultaneously minimised rolling resistance and vibration. Treat the output as a central estimate to test, not a final decision.
The inputs that change the estimate most
Total system weight
Include the rider, bike, bottles, tools, spares and everything else you will carry during the race. Greater load usually requires higher pressure to maintain similar tyre deformation and support.
Measured tyre width
A tyre labelled 28 mm may measure differently when mounted and inflated on your rim. Internal rim width and tyre construction alter its actual width and air volume.
Measure the widest point with callipers, using the rim you will race on and pressure close to your intended race pressure. Do not automatically enter the nominal sidewall width.
Surface and expected speed
Select Track, Pavement or Gravel, then the relevant surface quality. Do not select the best tarmac you will encounter for just a few kilometres. Use the surface that represents the largest and most significant part of your course.
Expected average speed is also an input because the frequency and cost of surface irregularities change with speed. It does not make the recommendation an exact prediction for every part of the course.
Tyre and bike type
Tubeless, Latex tube, Inner tube and Puncture resistant help the model approximate differences between setups. TT / Tri, Road, Gravel and MTB estimate different weight distributions between the wheels.
These are general assumptions, not measurements of your setup or actual riding position.
Why front and rear pressures differ
The rear wheel usually carries more of the total weight, so the calculator often suggests slightly higher rear pressure. The difference depends on geometry, saddle position, bike, bottles and body position.
Equal pressures can leave the front tyre firmer than necessary. However, do not assume that every rider needs the same PSI difference. The calculator estimates weight distribution; it does not measure it.
Very low pressure also has costs and risks
Reducing pressure does not make you endlessly faster. If it falls too low:
- tyre deformation increases,
- the tyre may fold or move through corners,
- rim-strike risk increases,
- a tubeless setup may lose air,
- puncture risk increases with inner tubes,
- handling precision and control decrease.
Tubeless removes the classic risk of pinching an inner tube between tyre and rim. It does not prevent rim strikes or damage, air loss or instability at excessively low pressure.
With hookless systems, compatibility comes before the calculator’s result
A hookless or Tubeless Straight Side (TSS) rim must use a compatible tyre within the approved width and pressure ranges. Citing the relevant ISO/ETRTO values, Schwalbe lists a maximum of 5.0 bar for widths of 25–29 mm, with lower limits at greater widths, such as 4.5 bar for 30–34 mm.
This does not mean those values apply to every hookless system. Before inflating:
- Check that the specific tyre is approved for your rim.
- Confirm the permitted width range.
- Check both rim and tyre maximum pressures.
- Always follow the lower limit.
If the calculator suggests pressure above the safe limit, do not disregard the manufacturer. You need a different tyre width or rim–tyre combination.
How to confirm pressure for your own setup
- Weigh the complete system as it will be used in the race.
- Measure actual tyre width on your race rims.
- Enter surface, tyre type, speed and bike type in the calculator.
- Check compatibility and all safety limits before testing.
- Use the same pump and gauge each time.
- Test small changes around the central value, changing one factor at a time.
- Repeat comparisons on the same route in conditions as similar as possible.
Assess power needed for similar speed, grip, cornering feel, vibration and your ability to maintain a stable position. One effort is insufficient: wind, line choice and traffic may have larger effects than the difference you are trying to measure.
For a triathlete, the best pressure is not simply the fastest over a short straight section. It must allow you to maintain aero position, control and intended intensity throughout the bike leg.
Key takeaways
- Higher pressure usually reduces deformation on smooth surfaces but does not guarantee lower total road resistance.
- Breakpoint pressure is a useful model estimate, not a universal value for every setup.
- Use total system weight and actual measured tyre width.
- Surface, speed, wheel size, bike type and weight distribution affect the recommendation.
- Very low pressure increases instability, rim-strike and air-loss risks.
- With hookless systems, compatibility and manufacturer limits always override any calculator recommendation.
- Confirm the result through repeated tests on your own bike and the race-course surface.
Use the Tire Pressure Calculator for an initial front and rear pressure estimate, then adjust it to your setup, course and the manufacturer’s safety limits.
Sources and further reading
- SILCA. Tire Pressure Calculator Explained — breakpoint model, casing losses and surface impedance.
- Reiser RF II, Watt J, Peterson M. Cycling on rollers: influence of tyre pressure and cross section on power requirements. Sports Biomechanics. 2003.
- Ryschon TW, Stray-Gundersen J. The effect of tyre pressure on the economy of cycling. Ergonomics. 1993.
- Buder J, Fouchard E, Schwanitz S. The Impact of Tyre Width, Pressure and Surface Condition on Rolling Resistance and Vibration Transmission of Bicycle Tyres. Journal of Science & Cycling. 2025.
- Macdermid PW et al. Tyre Volume and Pressure Effects on Impact Attenuation during Mountain Bike Riding. Shock and Vibration. 2015.
- Schwalbe. Hookless Rims — compatibility and maximum pressure guidance.
- Schwalbe. Hookless Info — ISO/ETRTO pressure table by tyre width.